- Details
- Category: Operations Guides
- Last Updated: Friday, December 8th, 2017
- Published: Thursday, December 11th, 2014
- Written by Chemayla & Ohnoto
Quick Info
8m Story Mode Health: 6,245,666
16m Story Mode Health: 11,333,195
Story Mode Enrage Timer: 6:45
8m Hard Mode Health: 7,527,889
16m Hard Mode Health:
Hard Mode Enrage Timer: 6:15
Added in Patch 3.0.0
The Ravagers
Sparky
Quartermaster Bulo
Chief Engineer Torque
Blaster & Master
Pirate Commanders
Screenshots
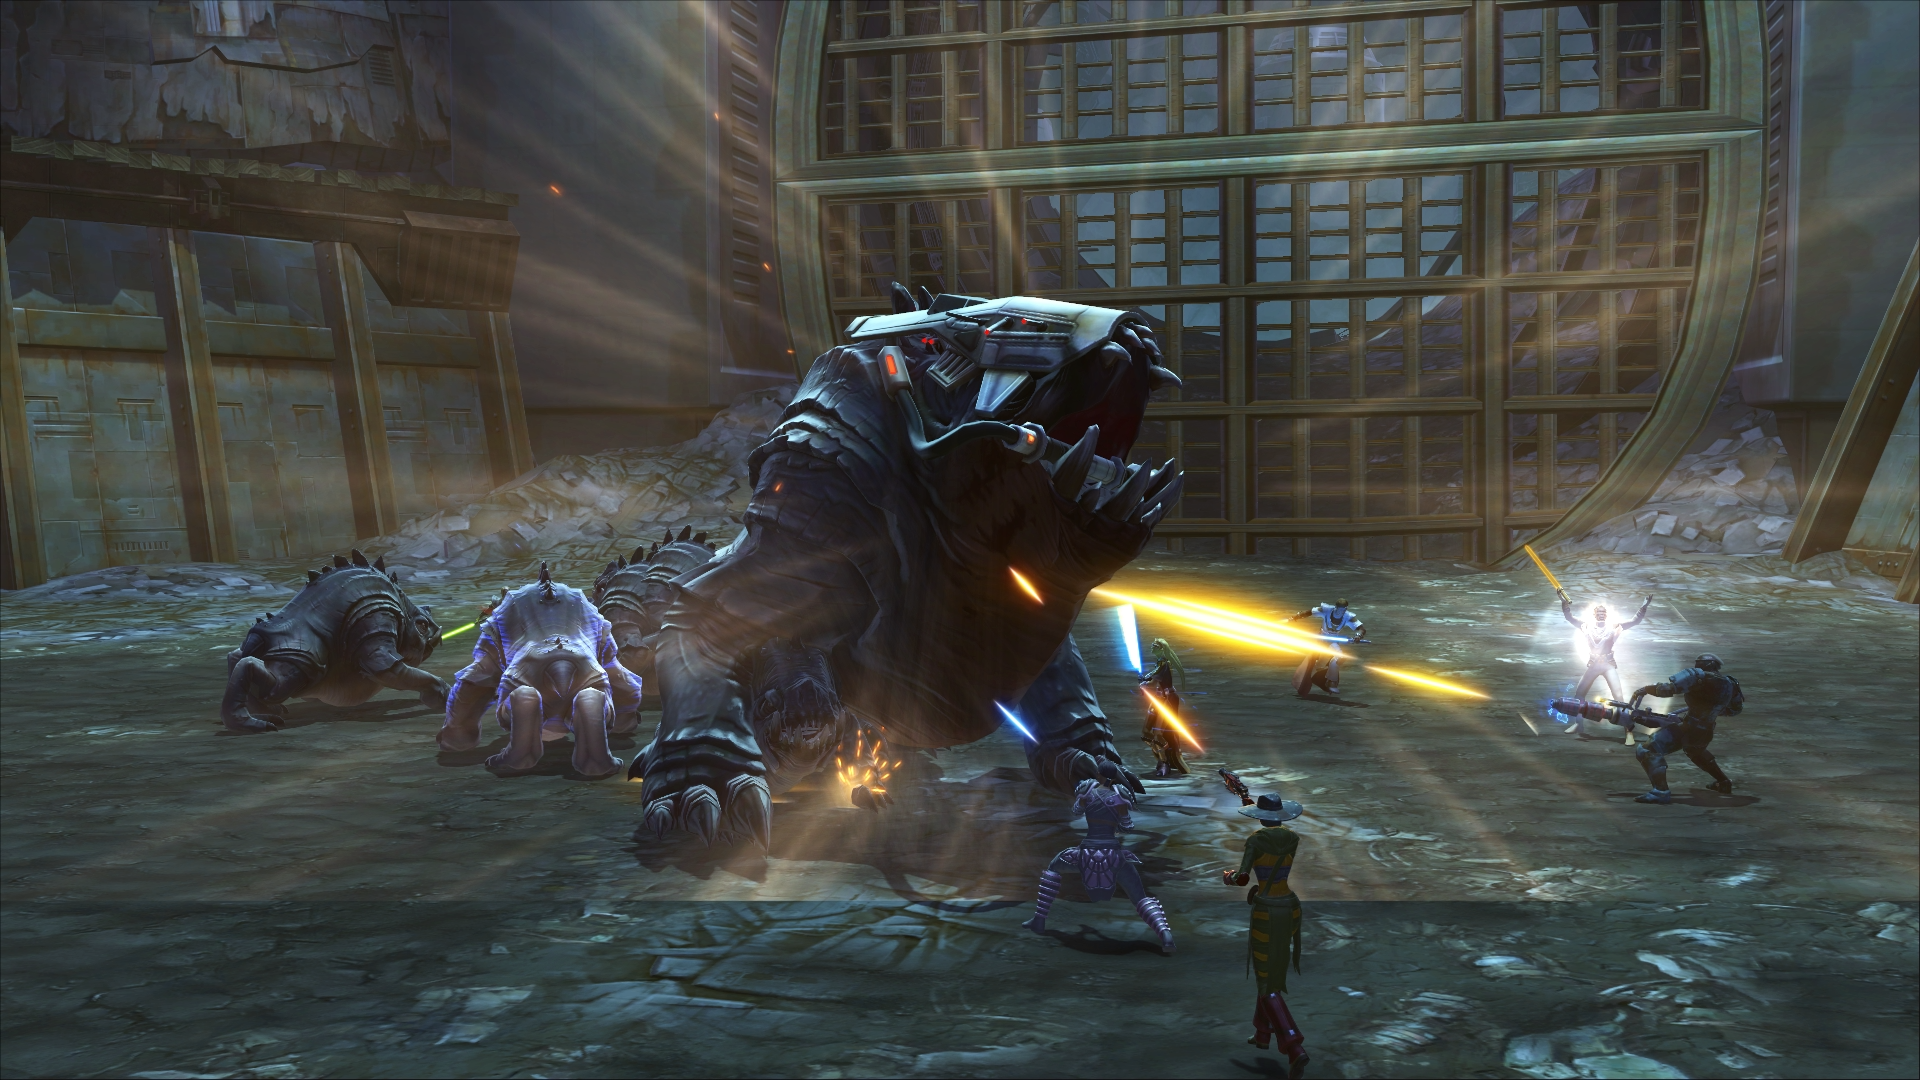
Sparky is the first boss in The Ravagers operation.
Video Guide
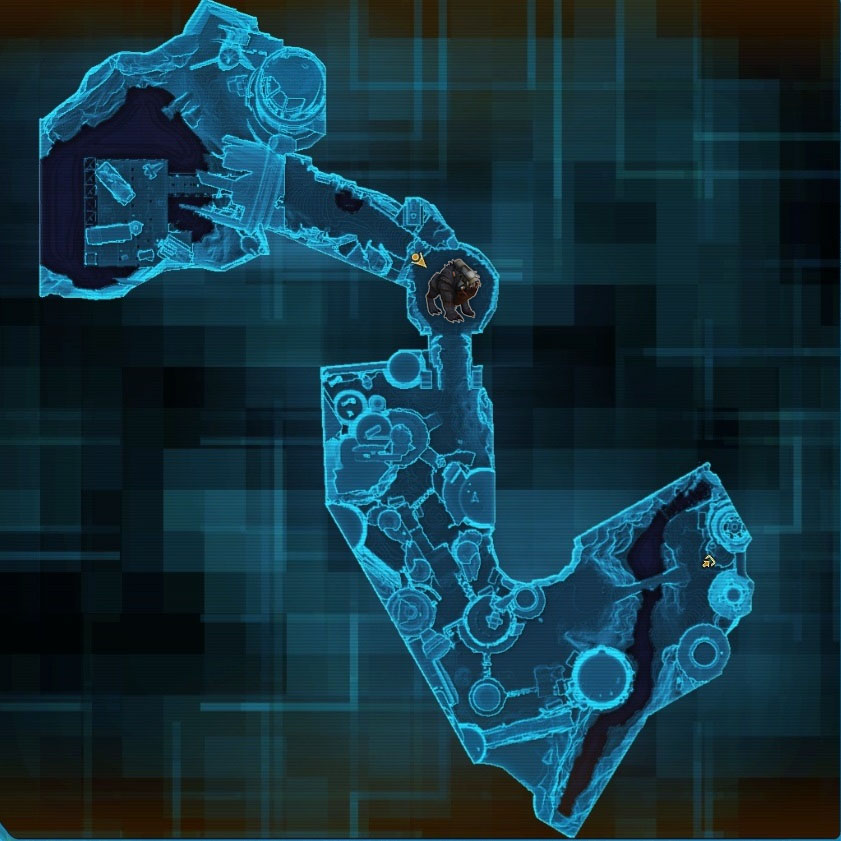
Map Location
Guide
 Story Mode
 Hard Mode
Story Mode
Story Mode Guide
Sparky is a tank and spank encounter. Throughout the encounter additional enemies will attack the operation team.
 Tanks
Tanks- When Sparky uses
 Shoulder Throw , the main tank will be launched away behind Sparky. Sparky will clear all threat from the main tank. The second tank should be utilize to pick up the boss quickly.
 - When the adds come out, Sparky will use
 Shield Collar Overdrive to shield himself. The main tank should continue to hold Sparky. The second tank should grab all of the adds.
 - When Sparky uses
 Rampage/Pounce , he will jump randomly at several players. During this time, Sparky is unable to be taunted.
 - When Sparky uses
 Pinned Down , he will jump on top of a random player for a short period of time. During this time, Sparky is unable to be taunted.
 DPS
DPS- When the additional enemies come out, all DPS players should turn and focus on those immediately.
- Once the Shield Collar Overdrive shield has expired, Sparky will fall on the ground. Sparky will take additional damage during this period. DPS should use their high damaging abilities while Sparky is laying on the ground.
- When Sparky uses Rampage/Pounce, he will jump randomly at several players. During this time, DPS players should spread out. As higher item rating gear is gained, players could group up for AOE heals.
- When Sparky uses Pinned Down, he will jump on top of a random player for a short period of time. The player pounced upon will be unable to move during the duration of the ability.
 Healers
- When the additional enemies come out, if a healer is targeted, be sure to move towards the tank, for the tank to grab the adds.
- When Sparky uses Rampage/Pounce, he will jump randomly at several players. During this time, healers should spread out. As higher item rating gear is gained, players could group up for AOE heals.
- When Sparky uses Pinned Down , he will jump on top of a random player for a short period of time. Be sure to focus healing towards the player pinned down.
Near the end of the fight near 30% he'll put up a shield again ![]() Shield Collar Overdrive. Burn it down and ignore any adds he spawns. This is the final burn phase and will end the fight. After the boss is dead clean up any adds left over.
Shield Collar Overdrive. Burn it down and ignore any adds he spawns. This is the final burn phase and will end the fight. After the boss is dead clean up any adds left over.